Automated Pit Identification and Measurement Software (APIMS)
Why APIMS?
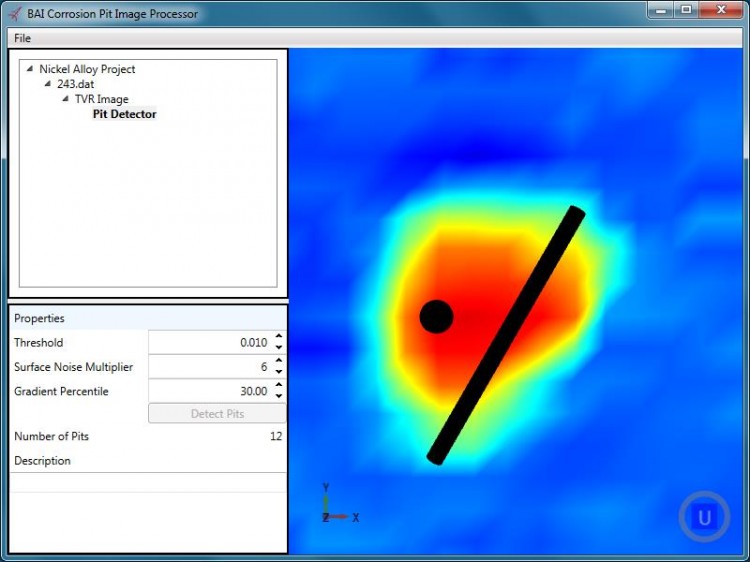
Surface pitting processes are ubiquitous in material science and engineering applications. Rigorous analysis of surface pitting features is time-consuming and error-prone whenever manual measurements are employed. Barron Associates’ APIMS software eliminates the need for tedious manual pit measurements. APIMS analyzes digital surface profilometry data and automatically identifies the location and size (width and depth) of surface pits. APIMS provides built-in noise reduction features to enhance performance and reduce both measurement noise and surface tilt.

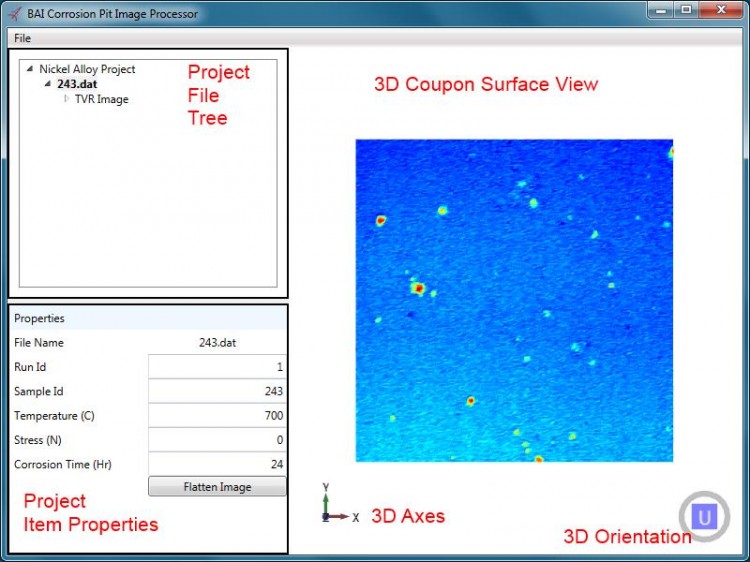
Figure 1: APIMS Main View

Figure 2: Surface Pit with Max Depth and Width Indicated
System Requirements
The APIMS application is designed for Microsoft Windows 7 or later and runs on the .NET 4.0 Framework.
System Usage:
The APIMS application enables a project-based workflow wherein a set of related corroded coupon images are collected and analyzed to identify and measure corrosion pits. A APIMS project file contains references to each coupon and its associated pit statistics. As new data are developed, CPIP can edit the project file to add these new coupons.
The APIMS software is designed to be compatible with many laser profilometer configurations. The APIMS input file structure is a simple tab-delimited text file depicting the z-axis (depth) measurements at each (x, y) coordinate. The software presumes that the (x, y) coordinates form a grid. Although it is not necessary that the grid be rectangular, the input file is expected to have some sort of sequential input (i.e. x-direction first, followed by y, or vice-versa).
The APIMS software is also designed for data archival. Once the surface data are imported into APIMS, the data can be associated with a project. A project allows the user to associate with it multiple surface images. These data are stored on the hard drive and can be opened and viewed at a later date. Any image processing done on the data is likewise stored, so the user does not need to remember parameters or re-process the data.
For more information, download the Software User’s Manual.
For pricing and ordering information, contact sales@barron-associates.com

